Departmental Standards
Company-Wide
eCornell Styleguide & Branding
Cornell University Branding
Writing and Editing Style Guide
Faculty and Expert Naming Conventions in Courses
Cornell School and Unit Names
Tips for Campus Engagements
LSG
Legal Policies
CSG
Updating Wrike Due Dates
Photography Style Guide
eCornell Mini Visual Style Guide
The Pocket Guide to Multimedia Design Thinking (*as It Pertains to Your Job Here)
Creative Services (CSG) Handbook
Administrative
LSG Meeting Recordings and Notes
Sending Faculty Sign-Off Forms in Adobe Sign
Weekly Faculty Status Emails
Animation/Motion Design
Instructional Design
Required Course Elements
The Pocket Guide to Instructional Design Thinking at eCornell
Adding AER to Canvas
Grading
D&D Newsletter
LSG Newsletter (LSGN) - February 2024
LSG Newsletter (LSGN) - March 2022 Edition
LSG Newsletter (LSGN) - December 2023
LSG Newsletter (LSGN) - October 2021 Edition
LSG Newsletter (LSGN) - June 2022 Edition
D&D Newsletter November 2024
LSG Newsletter (LSGN) - August 2022 Edition
LSG Newsletter (LSGN) - June 2023
LSGN Newsletter April 2023
LSG Newsletter (LSGN) - February 2022 Edition
LSG Newsletter (LSGN) - October 2022 Edition
LSGN Newsletter February 2023
LSGN Newsletter March 2023
D&D Newsletter September 2024
LSG Newsletter (LSGN) - August 2023
LSG Newsletter (LSGN) - March 2024
LSG Newsletter (LSGN) - April 2022 Edition
D&D Newsletter - August 2024
LSGN Newsletter January 2023
LSG Newsletter (LSGN) - October 2023 article
LSGN Newsletter (LSGN) - April 2024
LSG Newsletter (LSGN) - November 2021 Edition
D&D Newsletter February 2025
LSG Newsletter (LSGN) - January 2022 Edition
LSGN Newsletter December 2022
D&D Newsletter April 2025
LSG Newsletter (LSGN) - July 2022 Edition
LSG Newsletter (LSGN) - September 2022 Edition
Course Development
Image Uploads for Inline Projects
How to Install the Firefox Canvas Utilities Extension
Revising a Course/ Creating a Redux Version/ Course Updates
Creating a Perma Link With Perma.cc
Course Content Deletion Utility — Removing All Course Content
Teleprompter Slide Template
Course Names
Requesting High Resolution Video Uploads
Technical Talking Points Template
Writing Discussions: Guidelines for IDs
Online Resources in Credit-Bearing Courses
Hiring Actors for an eCornell Project
Marketing
Operations
Tech
Master Course Template Differences (8675309s)
Non-CSG File Uploads
Mentored Learning Conversion Process and Resources
Doc-Based Master Course Template and Standards (8675309-DOC)
Pedagogical Guidelines for Implementing AI-Based Interactives: AER
Coding Master Course Template and Standards (8675309-CODE)
Practice Quiz Standards
Hero Image
Platform Training
Administrative Systems
ADP
Google Drive
Downloadables Process
Embed a Document from Google Drive
Adding Google Links to Canvas
File Naming and Storage Convention Standards
Google Drive for Desktop Instructions
Storing Documents in Multiple Locations
Wrike
Wrike System Fundamentals
Field Population
1.0 to 2.0 Wrike Project Conversion
Blocking Time Off in Work Schedule (Wrike)
Wrike Custom Field Glossary
Wrike "Custom Item Type" Definitions
How to Create a Private Dashboard in Wrike
Using Timesheets in Wrike
Importing Tasks into a Wrike Project
Wrike Project Delay Causes Definitions
Setting OOO Coverage for Roles in Wrike
How to Change a Project's Item Type in Wrike
Using Search in Wrike
How to Create a Custom Report in Wrike
@ Mentioning Roles in Wrike
Automate Rules
Using Filters in Wrike
Managing Exec Ed Programs in Wrike
External Collaborators
Wrike for External Collaborators: Getting Started
Wrike for External Collaborators: Views
Wrike for External Collaborators: Tasks in Detail
Wrike Updates
New Experience Update in Wrike
Wrike Course Development Template 2.0 - What's New
Wrike - Course Development Template 3.0 Release Notes
Wrike Process Training
Course Development & Delivery Platforms
Canvas
Development
Adding Custom Links to Course Navigation
Adding Comments to PDFs from Canvas Page Links
Setting Module Prerequisites and Requirements in Canvas
Canvas Page Functionality
Create a New Course Shell From 8675309
Using LaTeX in Canvas
Search in Canvas Using API Utilities - Tutorial
Reverting a Page to a Previous Version
Student Groups
Create Different Canvas Pages
Importing Specific Parts of a Canvas Course
Canvas HTML Allowlist/Whitelist
Understanding Canvas Customizations/Stylesheets
Operations
Discussion Page Standards
How to import a CU course containing NEW quizzes
Canvas LMS: NEW Quiz compatibility
Faculty Journal
Course Content Style Guide
Click-To-Reveal Accordions in Canvas
Course Maintenance Issue Resolution Process
Meet the Experts
Codio
Codio Operations
Managing Manually Graded “Reflect and Submit” Codio Exercises
Codio Structure and Grading for Facilitators
Premade Codio Docs for Ops & Facilitators
Codio Remote Feedback Tools for Facilitators
Developers
Development Processes
Creating a New Codio Course
Creating a New Codio Unit
Integrating a Codio Course into Canvas Using LTI 1.1
Embedding a Codio Unit into Canvas
Setting Up the Class Fork
Jasmine Autograde Unit Testing
Setting Up the Class Fork (LTI 1.3)
R Studio - Exclusion List for R Code
Mocha/Selenium Autograding
Starter Packs in Codio
Configuring Partial Point Autograders in Codio
Launch a Jupyter Notebook from VM
AI Extensions
Program-Specific Developer Notes
Codio Functionality
Jupyter Notebooks
Jupyter Notebooks - nbgrader tweaks
Jupyter Notebooks Style Guide
Adding Extensions to Jupyter Notebooks
Setting up R with Jupyter Notebooks
Change Jupyter Notebook Auto Save Interval
How to Change CSS in Jupyter Notebook
RStudio in Codio
How To Centralize the .codio-menu File to One Location
Codio Fundamentals for LSG
Using the JupyterLab Starter Pack
Using Code Formatters
Using the RStudio Starter Pack
Conda Environments in Codio
Updating Codio Change Log
Codio Basics: Student Support
eC Facilitator Guide to Codio
Migrating to Updated Codio Courses
Qualtrics
Ally
Ally Institutional Report Training
Ally Features Overview Training
Using the Ally Report in a Course
Ally Vendor Documentation/Training Links
Adobe
Other Integrations
Pendo Overview
How to Add VitalSource eBooks in Canvas
Enabling Zoom/"Live Sessions" in a Course
Pendo Guide Creation
H5P
Modifying Subtitles in H5P Interactive Videos
Embedding H5P Content Into Canvas
Troubleshooting H5P Elements in Canvas
Inserting Kaltura Videos into H5P Interactive Videos
Adding Subtitles to H5P Interactive Videos
S3
BugHerd
Instructional Technologies & Tools Inventory
Canvas API Utilities
Getting started with the MOP Bot
eCornell Platform Architecture
HR & Training Systems
Product Development Processes
Accessibility
What Is Accessibility?
What Is Accessibility?
Accessibility Resources
Accessibility Considerations
Accessibility Support and Assistive Technology
Structural Accessibility
Accessibility Design and Development Best Practices
Accessible Images Using Alt Text and Long Descriptions
Accessible Excel Files
Accessibility and Semantic Headings
Accessible Hyperlinks
Accessible Tables
Creating Accessible Microsoft Files
Mathpix: Accessible STEM
Design and Development General Approach to Accessibility
Integrating Content Authored by a Third Party
Planning for Accessible Tools
Accessibility Considerations for Third Party Tools
Studio Accessibility
Designing for Accessible Canvas Courses
Accessibility: Ongoing Innovations
Course Development
Planning
Development
0. Design
1. Codio Units
1. Non-Video Assets
3. Glossary
4. Canvas Text
4. Tools
4. Tools - Wrike Task Definitions
3. Review And Revise Styled Assets
ID/A to Creative Team Handoff Steps
General Overview of Downloadables Process
Course Project: Draft and Final
Excel Tools: Draft and Final
eCornell LSG HTML Basics
1. Non-Video Assets - Wrike Task Definitions
2. Video
Multifeed Video
2. Video (Standard) - Wrike Task Definitions
Studio Tips
Tips for Remote Video Recording Sessions
Who to Tag for Video Tasks
3. Animation
3. Animation - Wrike Task Definitions
2. Artboard Collab Doc Prep
6b. Motion Design Review and Revise
Who to Tag for Animations Tasks
3. Artboard Collab Process Walkthrough
DRAFT - FrameIO Process Walkthrough
Motion Contractor Guide for IDAs / IDDs
Requesting / Using Stock Imagery (Getty Images and Shutterstock)
3. Ask the Experts
5. On-Demand Conversion
5. Review
5. Review - Wrike Task Definitions
1. Prep Course for Reviews
2. Conduct Student Experience Review
3. Implement Creative Director Edits
3. Implement IDD Edits
3. Implement Student Experience Review Edits
4. CSG - Revise Tools Export 1
5. Conduct Faculty Review
6. Implement Faculty Edits
7. Conduct Technical Review of Course (STEM-only)
Technical Student Experience (Tech SE) Review Process
2. Conduct IDD or Sr ID Review
6. Alpha
6. Alpha - Wrike Task Definitions
Alpha Review Process
Prepare a course for Alpha review
Schedule & Conduct Alpha Triage Meeting
7. QA
7. QA - Wrike Task Definitions
1. Prep Course for QA
2. Copy Edit Captions
2. Copy Edit Course & Files
4. Conduct Content QA of Course
4. Final Creative Review and Export
Adding Chat With Tech Support to Course Navigation
5. Implement QA Edits
Working With Video Captions That Contain Special Characters
Copy Edit Captions in SubPLY
Creating a Course Style and Settings Guide
Copy Editing Content in Frame.io
1. Complete Dev to QA Checklist
Copy Edit Captions in 3Play
Tag a Video for Transcription by 3Play
Course QA Checklists
8. Deployment
8. Deployment - Wrike Task Definitions
1. Finalize Master Version of Course
2. Create & Add Course Transcript (CT) to Course
Replace a Master -M With a Redux Version of the Course
3. Create -T (Training Course) and Associate With Master Blueprint
Canvas Blueprint Course Functionality
Project Management in Wrike
Managing Project Reporting in Wrike
Managing Task Needs/Schedule in Wrike
Adding Tasks
Comments and Communication
Statuses
Updating Task Start and Due Dates
Predecessors
Durations
Rollups
Calculating Project Schedule by Deadline in Wrike
Creating Course Project Plans in Wrike
Setting Custom Capacity for Resources
Customizing Effort in a New Project Plan
Marking Projects Complete in Wrike
How to Set Up Workload Charts to Track Effort in Wrike
For-Credit Considerations
1-Sheet Population
Post-Development
AI Simulations
Program Facilitation & Operational Guidelines
Data Science
Facilitator Resources
Canvas Navigation
Adding Events to the Course Calendar
Navigating Canvas and the Dashboard
How Do I View Previous Courses I Have Taken or Facilitated?
Why Am I Receiving Duplicate Canvas Emails?
How Do I Edit My Canvas Profile?
Send Students a Direct Message on Canvas
Adding Notes to Canvas Gradebook
How Do I Send Students Nudges from the Gradebook?
Overview of 2024 Changes- Course Layout and Structure
How Can I Update My Canvas Notification Preferences?
Ursus Navigation
How Do I Access My Offer in Ursus?
How Do I Edit My Ursus Profile?
How Do I Request Time Off (Blackout Dates)?
How Can I Request to Learn More Courses?
Live Sessions
Enabling Student Use of Closed Captioning in Zoom
When Should I Schedule My Live Sessions For?
Changing Live Session Date and Time After Created with Facil Tool
Help! I Need to Reschedule a Live Session
Live Session Information page
Set up Live Sessions with the Facil Tool
Combining Live Sessions with Facil Tool
Course Set-Up
Course Set Up: Getting Ready for Live Sessions
Recording and Posting a Welcome Video
Course Set Up: When can I begin to edit my course?
Course Set Up: Reviewing Due Dates
Course Set Up: Reviewing Announcements
What Do I Need to Do to Make Sure My Course is Set Up Correctly?
How Do I Customize My Course Sections?
Course Announcements and Messages Templates
Facilitator Focus
Zoom and other Technical Support
Reporting Spam/Phishing
How Do I Set Up My Zoom Account?
Support Resources for Facilitators
Live Session/Zoom Trouble Shooting Guide & Technical Readiness
How to Upload Videos to Zoom On-Demand
Student Survey FAQs
How Do I Save and Refer Back to Zoom Recordings?
How Do I Find My Personal ID Meeting link in Zoom?
Benefits as an eCornell Employee
Do I Have Access to Microsoft Office as a Cornell Employee?
Taking Courses as a Student
Professional Development Benefit
Student Success
Help! My Students Can't View a Video Within My Course
Extensions and Retakes
Policies and Navigation Resources for Students
Symposium Access Extension- Fall 2025
Students enrolled through special groups: Corporate and VA
Unique Circumstances for Student Extensions and Retakes
Communicating with Students via Canvas
Can I Provide Students with a Letter of Recommendation?
Understanding and Addressing Instances of Plagiarism
Support Resources for Students
Understanding and Addressing Use of AI
Help! My Student is Having a Hard Time Uploading a Video
Unique Student Situations
I Have a Student Requesting Accommodations- How Should I Proceed?
Canvas Mobile App
Messaging Students via the Canvas Mobile App
Setting up and Navigating the Canvas Mobile app
Setting up Push Notifications on Canvas Mobile
Canvas App Features for eCornell courses
New Facilitator Onboarding and Quick References
Facilitator Onboarding at eCornell
Why Do I Have Multiple eCornell email and Canvas Accounts?
Quick reference: Systems and Accounts we use at eCornell
Quick reference guide: Key eCornell Personnel
How do I Log Onto Canvas and Access FACT101?
How Do I Add eCornell to My Email Signature?
Training Course Review & Facilitation Authorization
What to Expect During Live Shadowing Experience
Setting up Email Forwarding
Facilitator Expectations and Grading Help
Changes in Grading Scheme: Incomplete/Complete and 75% to 85%
New (Embedded/Inline Format) How do I grade Course Projects?
Navigating the Gradebook and Accessing the Speedgrader
Quick Reference: Sort assignments in the Speedgrader
How do I Grade Quizzes?
(Old format) How Do I Grade Course Projects and Add Annotations?
Rubrics for Effective Facilitation
Is There an Answer Key for my Course?
How to Monitor and Promote Student Progress
How Do I Grade Discussions?
Adding an Attempt to a Course Project
How Quickly Do I Need to Provide Grading to Students?
Payroll and the Monthly Scheduling Process
Codio References
Manually Graded “Reflect and Submit” Codio Exercises
Codio Quick Resources
Codio Reference: Embedded quiz questions (H5P)
Codio Reference: Checking for Completion Status
Codio Reference: Manually Graded Exercises
Codio Remote Feedback Tools
Codio Reference: Ungraded exercises
Codio Reference: Autograded Exercises
Archived
Table of Contents
- Overview
- Using the Canvas built-in Accessibility checker
- Ally
- Using 3rd party tools for accessibility Testing
- All Categories
- Product Development Processes
- Accessibility
- Accessibility: Ongoing Innovations
- Guide to Using Accessibility Checker Tools
Guide to Using Accessibility Checker Tools
 Updated
by Jason Carroll
- Overview
- Using the Canvas built-in Accessibility checker
- Ally
- Using 3rd party tools for accessibility Testing
Overview
Ensuring your Canvas content is accessible is important for creating an inclusive learning environment. Sometimes It's best to use a mix of the Canvas built-in accessibility checker, Ally the LTI (Learning Tools Interoperability) tool, and other 3rd party tools like axe DevTools and WAVE for a complete accessibility check. The Canvas checker is great for basic issues but might miss the more complex ones. External tools like axe and WAVE provide a deeper analysis and can handle a broader range of issues, including the tricky parts of coding. Combining these tools means you're doing a more thorough check of your content. This guide will give you step-by-step instructions on how to get started with the Canvas checker, along with the mentioned plugins.
Using the Canvas built-in Accessibility checker
The Accessibility Checker in the Rich Content Editor helps spot typical accessibility issues. Some of the top features as part of the Canvas accessibility checker:
- Image Alt Text: This feature makes sure every image has a description that's easy for screen readers to use. Very important for accessibility.
- Text Contrast: Verifies that text meets minimum contrast ratios.
- Sequential Headings: Checks that your headings follow in a logical order, which helps keep everything organized and easy to follow.
For a complete list of features built into the accessibility checker, visit “How do I use the Accessibility Checker in the Rich Content Editor as an instructor?”
How to use the Canvas accessibility checker
- View accessibility checker notifications
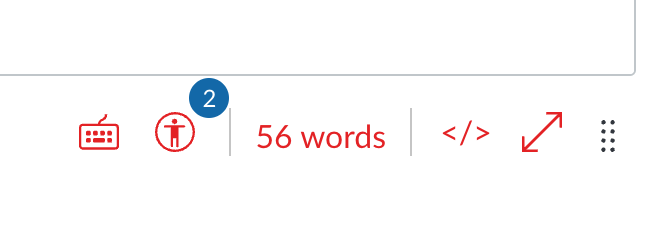
If the Rich Content Editor spots any accessibility problems, you'll see an indicator pop up from the Accessibility Checker. Click on the Accessibility Checker icon to see what the issues are.
- View issues
If there's a problem, the Rich Content Editor will light up the area with the issue. Over in the sidebar, you'll see the accessibility attribute that's causing the problem and a breakdown of what's wrong. Want more details on the accessibility attribute? Just hit the Information icon.
- Apply fix
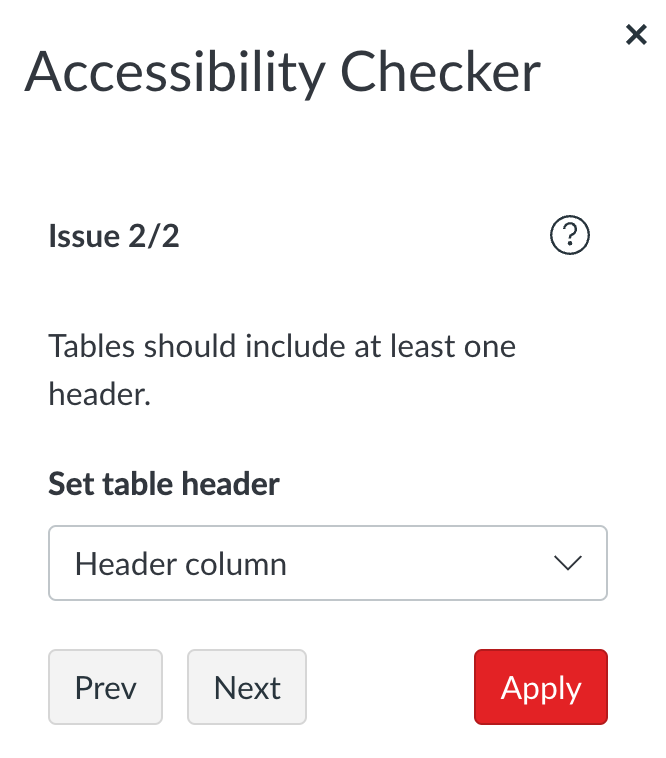
- To fix an issue, just follow the instructions in the sidebar. Say the problem is a missing alt text for an image; the sidebar will show a text field for you to type it in.
- After you've made your changes, hit the Apply button.
The Accessibility Checker will take care of the fix and then show you what's next. Keep going through and sorting out any issues it finds in the editor.
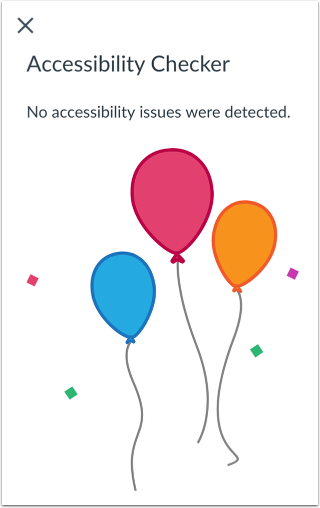
- Confirm fix: When all issues have been fixed, or if no issues are detected in the Rich Content Editor, the sidebar indicates that no issues exist and will close automatically.
Ally
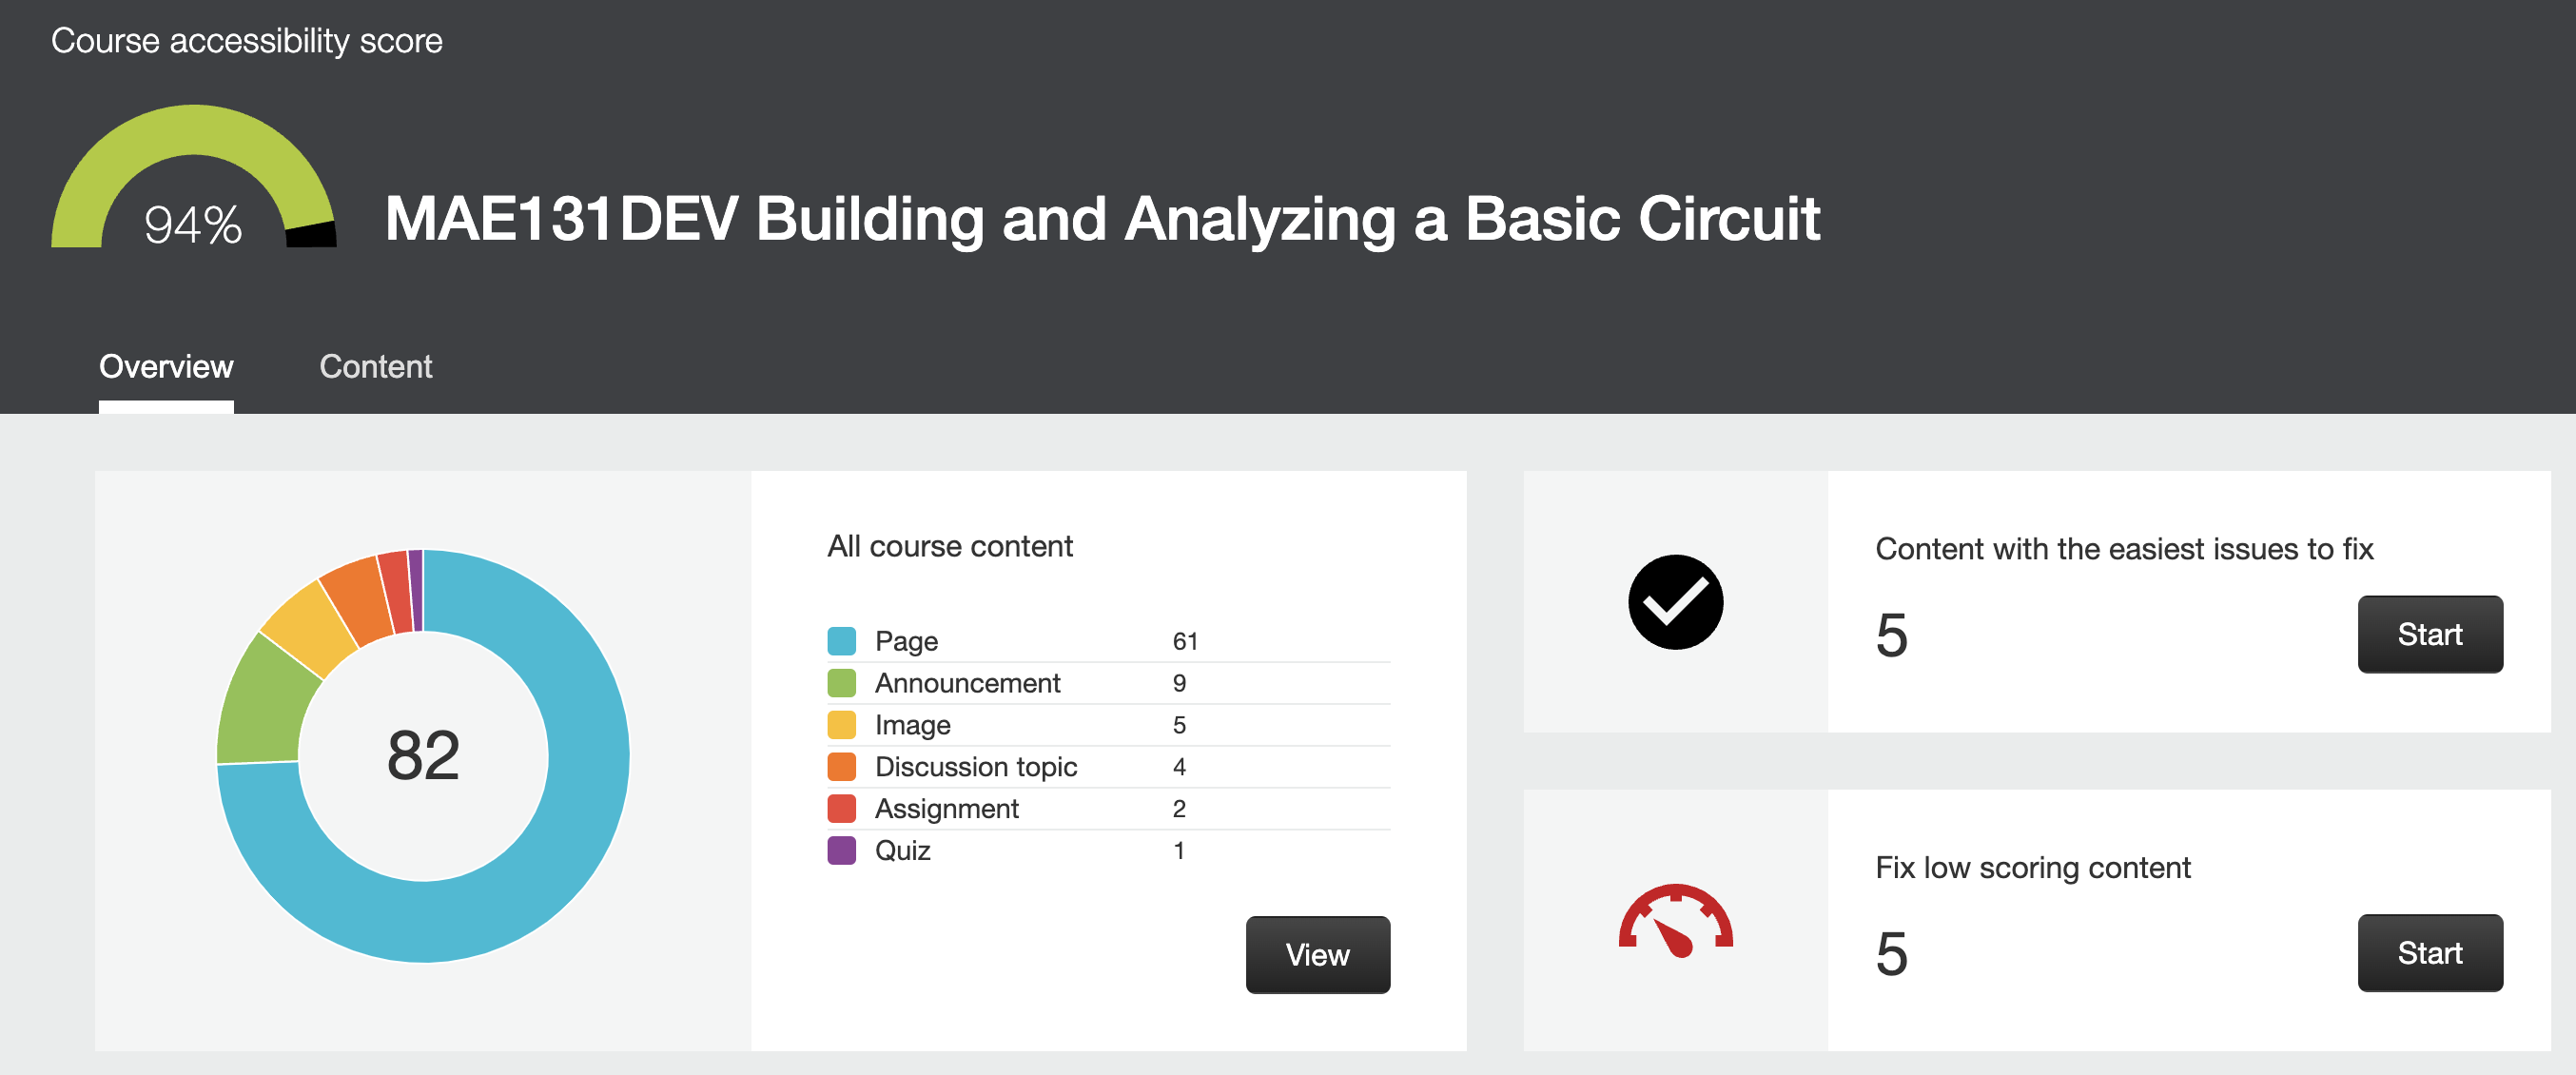
Ally is a LTI web accessibility checker tool that can be accessed within the eCornell instance of Canvas LMS.
Learn how to use Ally at kb: Using the Ally Report in a Course
Using 3rd party tools for accessibility Testing
What is axe DevTools?
axe DevTools is a Google Chrome extension that assists in identifying and fixing common accessibility issues on web pages. It's an automated tool that can help you ensure your Canvas content is accessible to all users.
How to Get Started with axe DevTools
- Install the Extension:
- Visit the Chrome Web Store and search for 'axe DevTools'.
- Click 'Add to Chrome' to install the extension.
- Open Canvas in Chrome: Navigate to your Canvas course page in Chrome.
- Open the browser’s Developer Tools: To open the developer console in Google Chrome, open the Chrome Menu in the upper-right-hand corner of the browser window and select More Tools > Developer Tools OR right-click on the Canvas page and click Inspect.
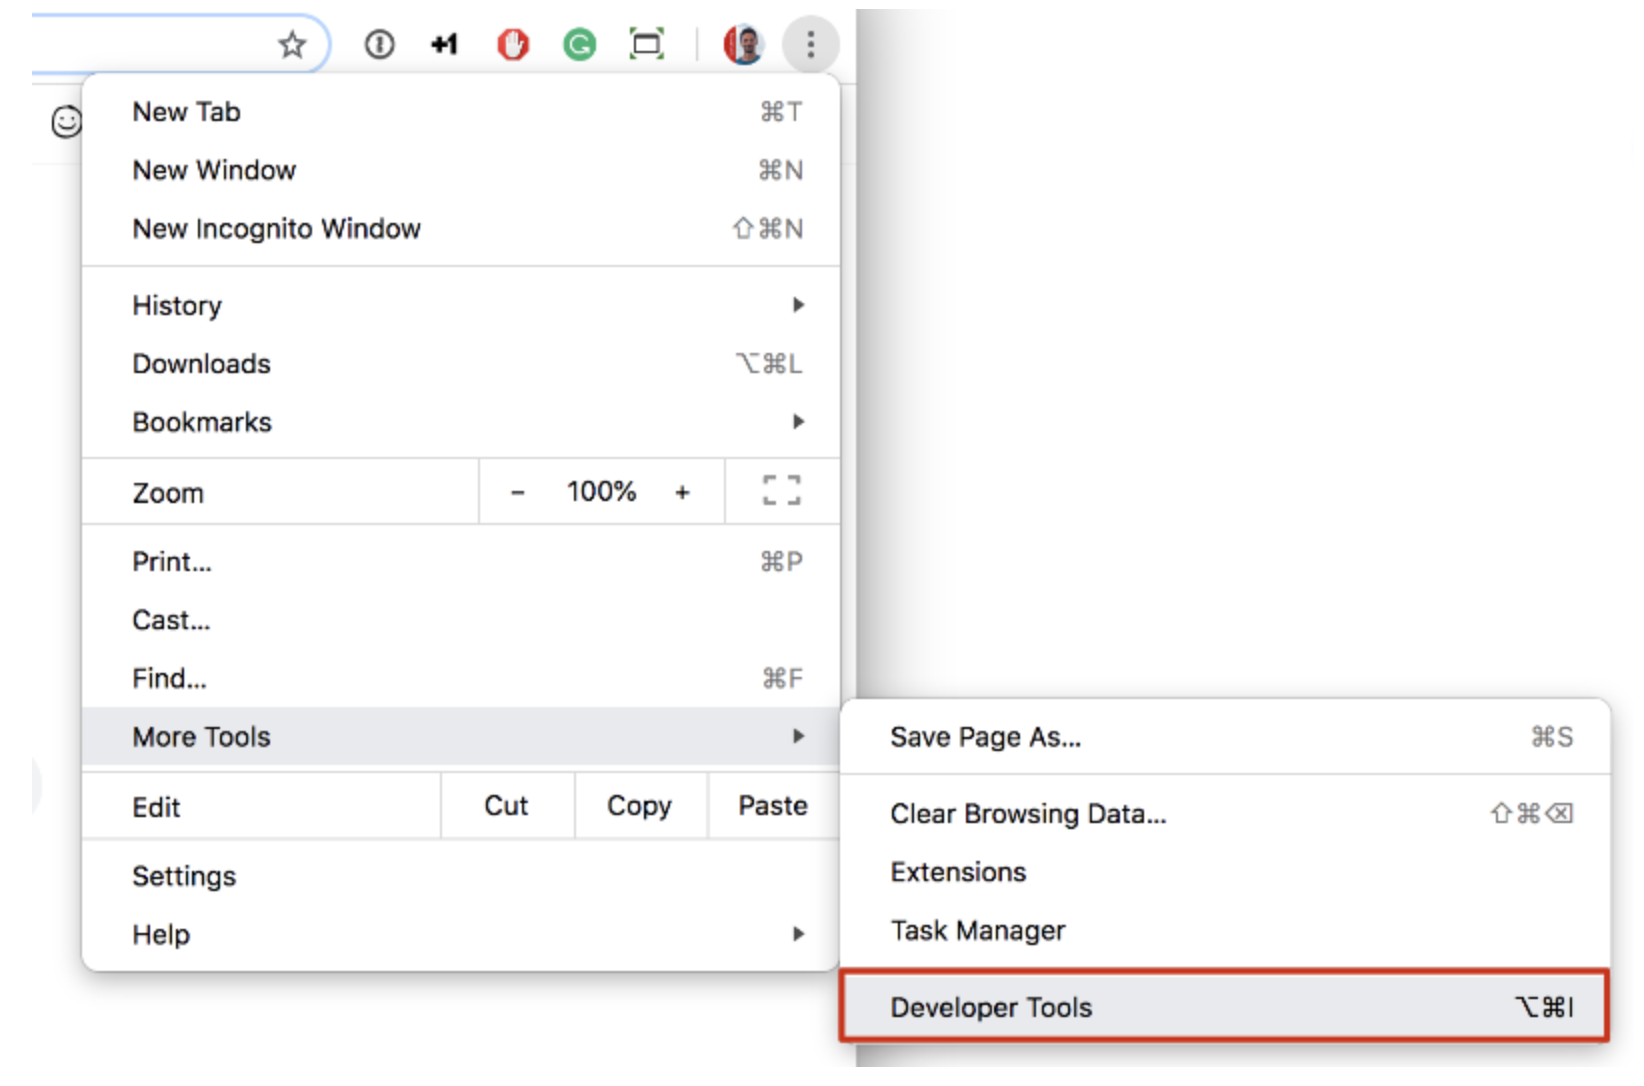 You can also use Option + ⌘ + J on the keyboard.
 - Open the axe DevTools tab, then click the axeDeb tab to open the tool.
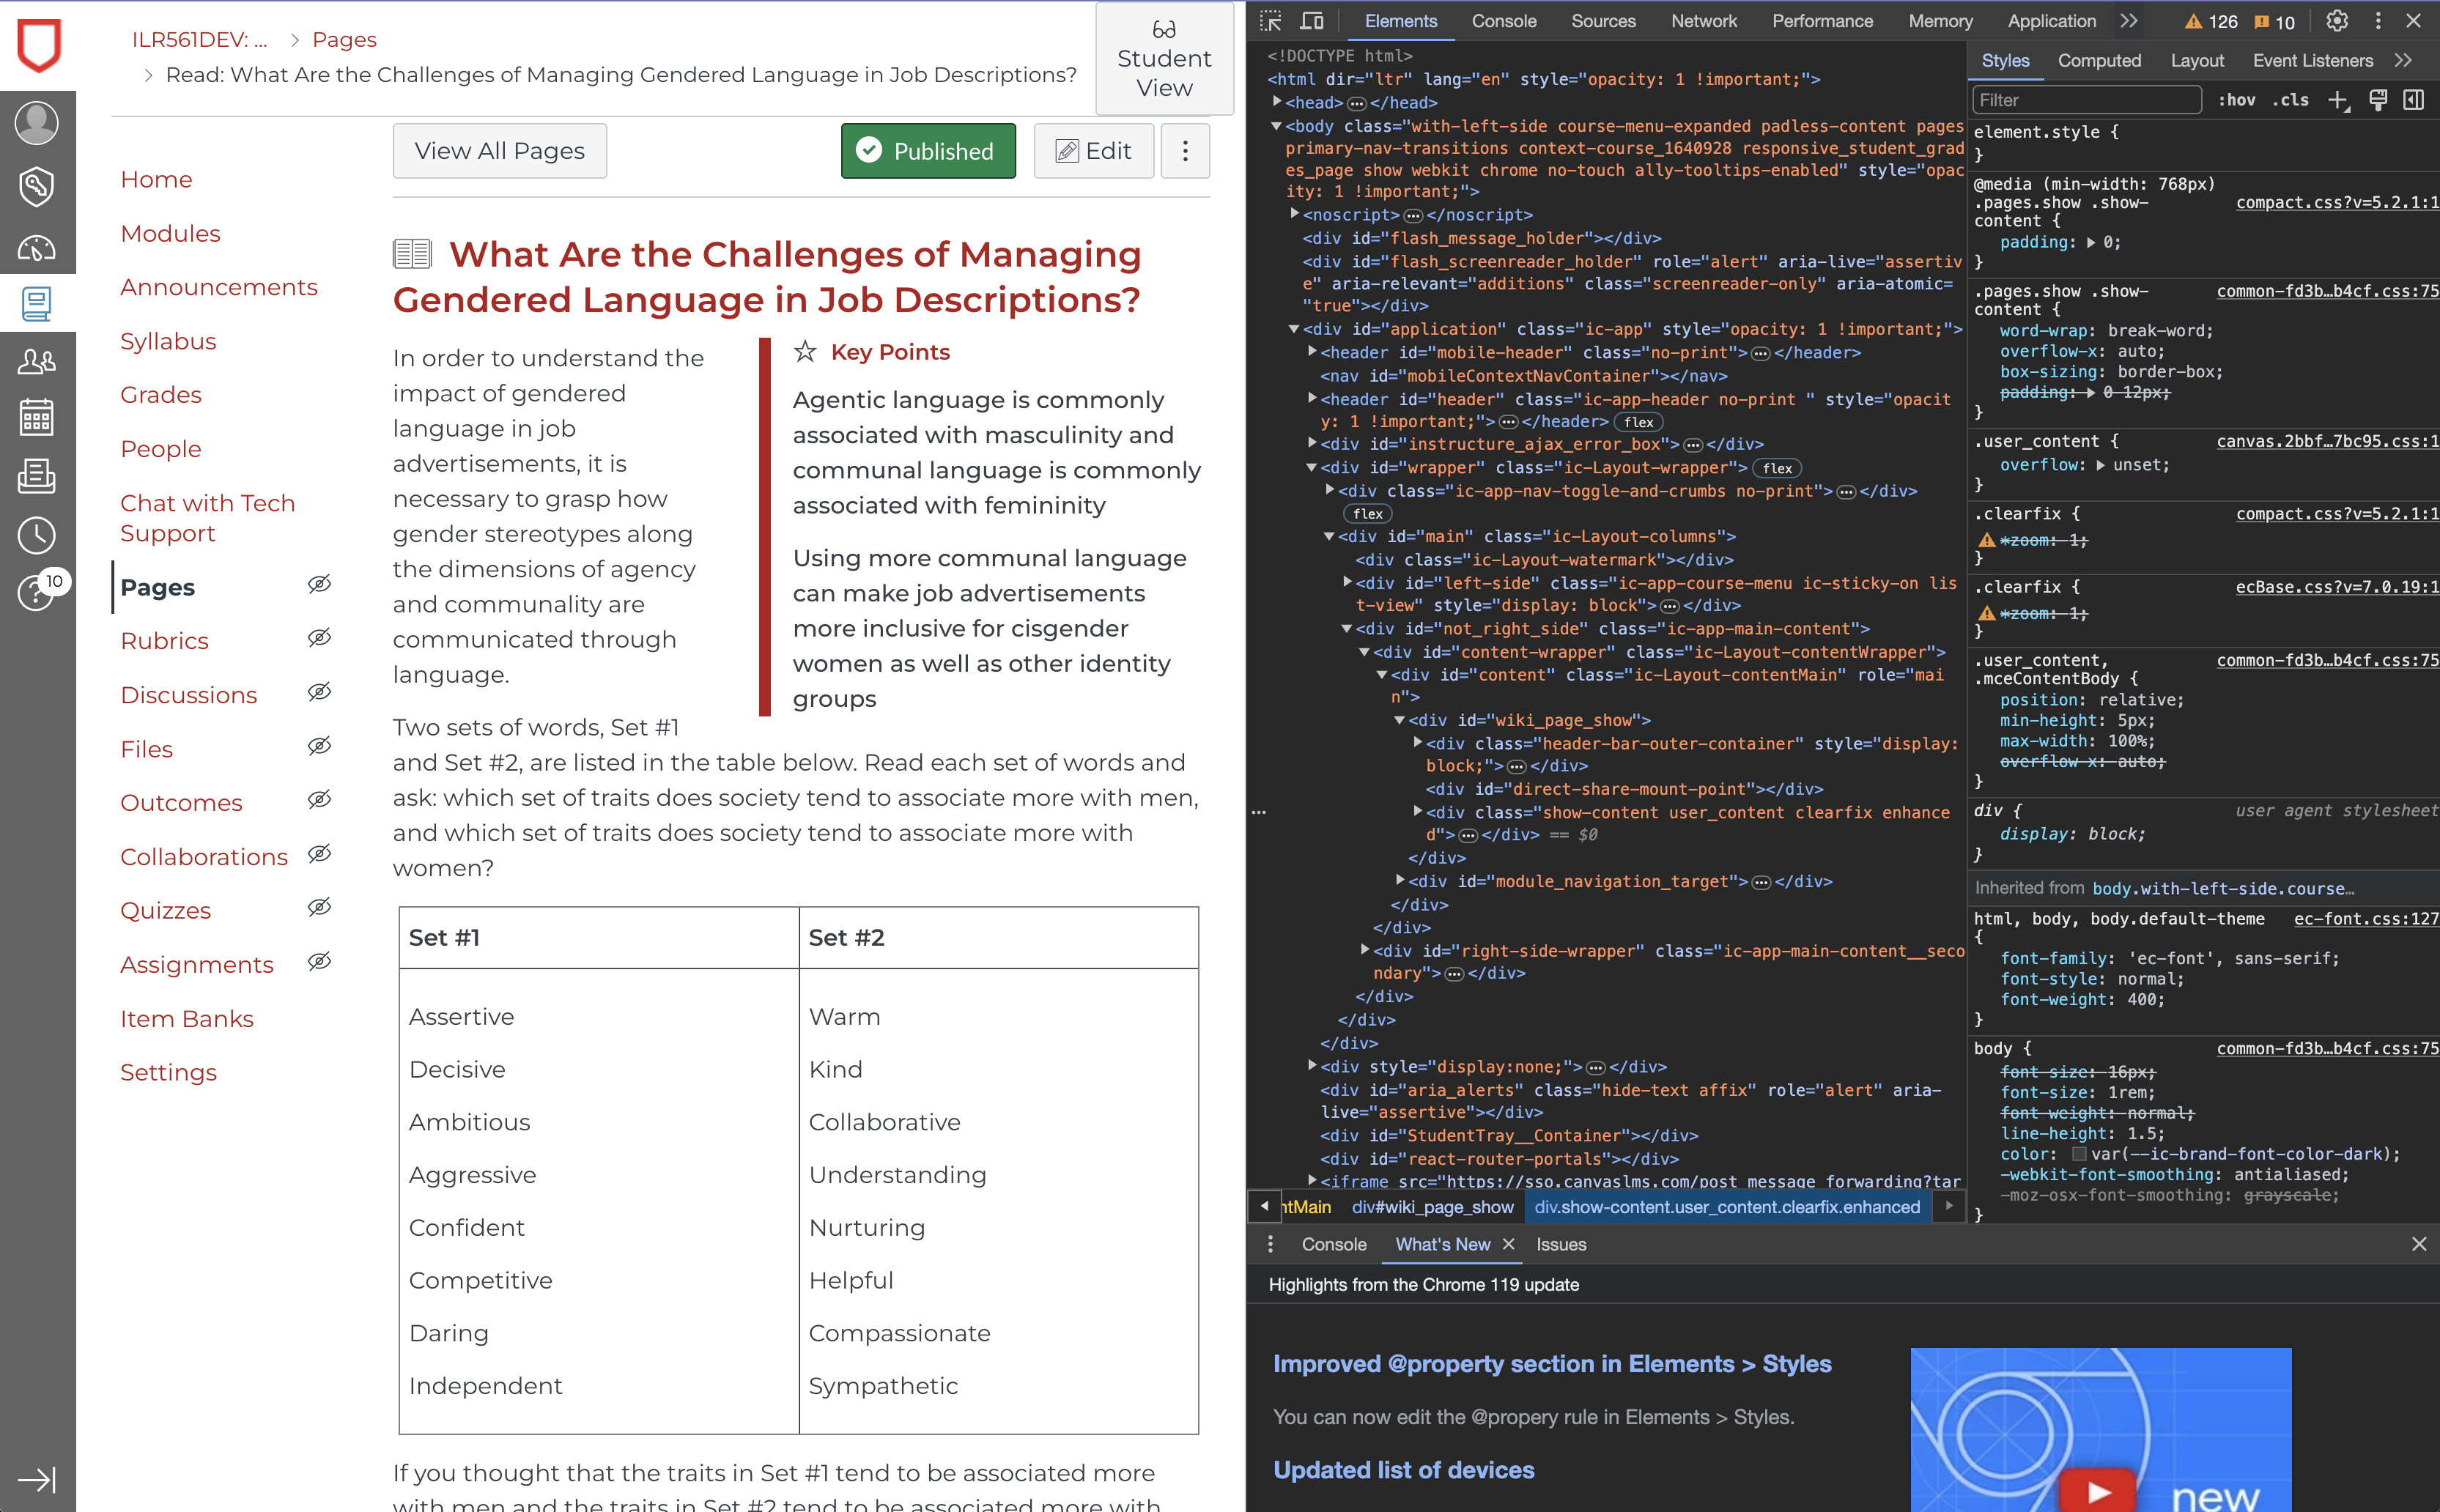
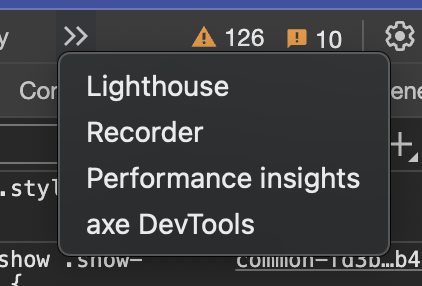
- Choose Scan ALL of my page.
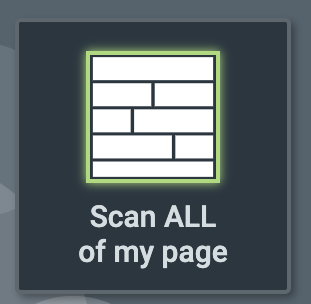
- Review Results: Once the analysis is complete, axe DevTools will display a list of accessibility issues found.
- Make Necessary Changes: Use the suggestions provided by axe DevTools to correct any identified accessibility issues in your Canvas content.
- Re-analyze: After making changes, re-run the analysis to ensure all issues have been addressed.
For more information, please visit “Get started: axe DevTools® browser extension”
What is WAVE?
WAVE is a browser extension that evaluates the accessibility of web content. It provides visual feedback and detailed insights into potential accessibility issues.
How to get started with WAVE
- Install the Extension
- Download the Chrome Wave Evaluation Tool. Click 'Add to Chrome' to install the extension.
- Open Canvas in Chrome: Navigate to your Canvas course page in Chrome.
- Run WAVE
- Click on the WAVE extension icon in your browser’s toolbar, typically located in the upper right corner of the Chrome browser window. WAVE will automatically analyze the page's accessibility.
- Review the Feedback
- WAVE displays various icons and indicators on the page to highlight accessibility issues.
- Click on the icons for detailed explanations and suggestions for improvement.
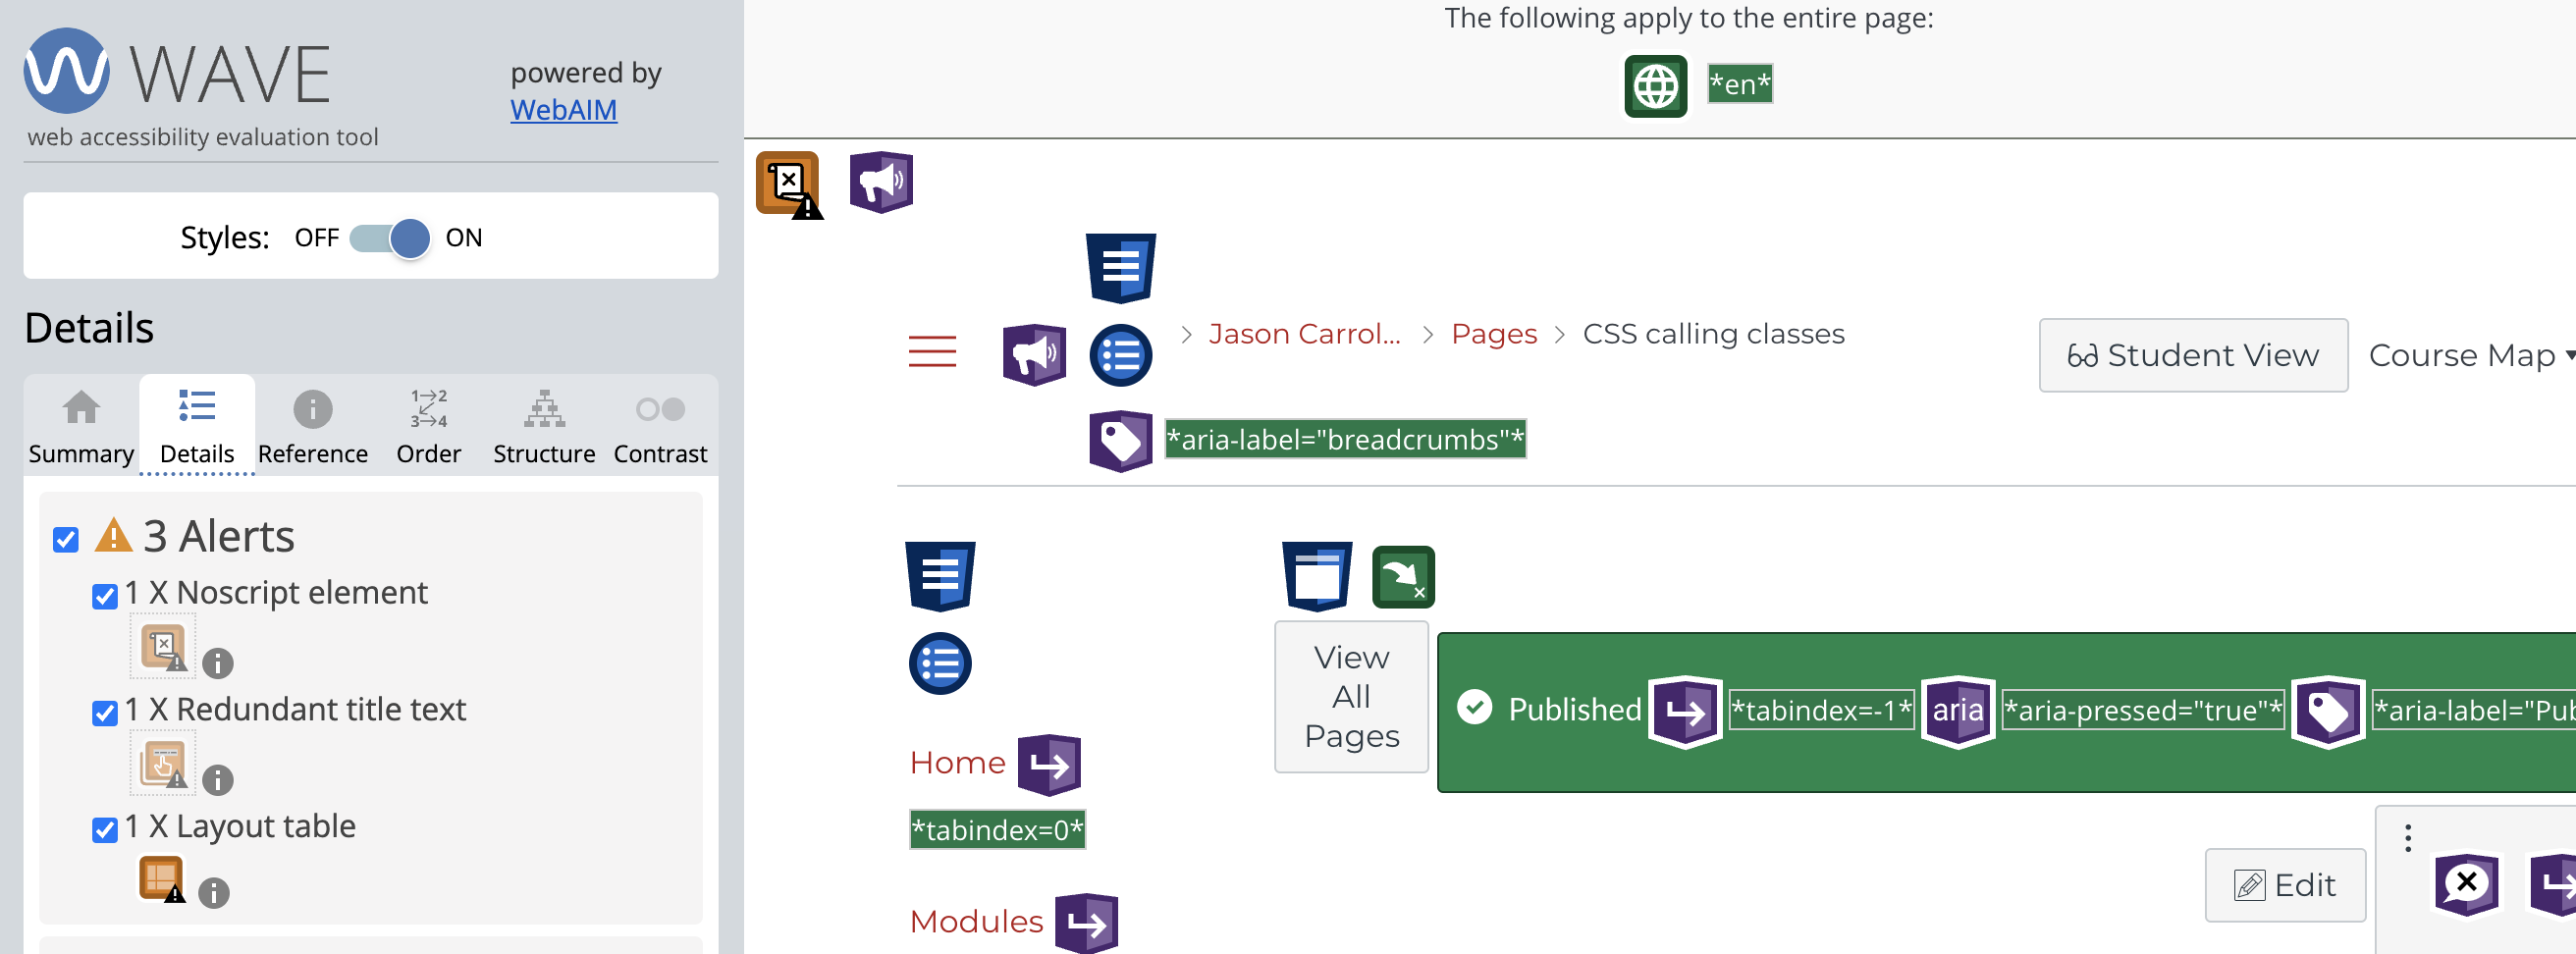
- Implement Changes: Make the necessary adjustments to your Canvas page based on WAVE's feedback.
- Recheck with WAVE: After updating your content, use WAVE again to ensure all accessibility issues have been resolved.
For more information, please visit the WAVE website.
Conclusion
Regular use of the Canvas accessibility checker, along with 3rd party tools like axe DevTools and WAVE can significantly enhance the accessibility of your Canvas courses. By following these steps, you can proactively ensure your content is accessible to all students, making your courses more inclusive and effective.
